Thursday, October 4, 2012

Boo....I am back!

I have been an awful blogger for the past couple of months....and I am hoping that I am going to do a much better job going forward!
Things have been absolutely crazy around here lately! Here is a quick recap to catch up so that I can start updating the blog with a few new tutorials and exciting news.......

 Chad and Collin started racing BMX bikes (Chad used to be BIG TIME into it when he was growing up and I used to go and watch him as kids).  Collin is in love with the sport and we were all loving it....UNTIL CHAD HAD A WRECK! He broke his left hand and wrist, shattered his right elbow, and bruised his ribs. OUCH! Huge wake up call that we aren't 18 anymore and we don't bounce well after falling.
 Chad had surgery to put the puzzle pieces in his elbow back together....and it turned out he had a bad reaction to the anesthesia and did not wake up or breath correctly for 4 hours after surgery! EEK! Now that we know the problem...it is much better! He has already had two surgeries and has at least one more to go! Thank goodness he is the BEST patient EVER and hasn't complained at all.
 The kids started school (second and kindergarten) and they really are having a great time!


 We took a MUCH needed trip to Daytona to get out of the house and have a break from all of the crap that comes along with having surgeries and a ton of Dr appointments for Chad's arms. Total Blast! Ferris Wheel, Salt Water Taffy, Boardwalk, Ice Cream shops, Water Parks.....and just a super fun old fashion beach weekend!
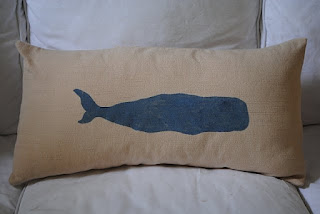
 I have added a few new pillow cases and table runners into our new shop! I might slightly be obsessed with Halloween!
 Chad and I celebrated our 9th wedding anniversary! It honestly feels like just yesterday we were getting married! I have no idea how it has been 9 years and we are the parents of an 8 year old and almost 6 year old! I am just SO grateful that I get to go through this life with Chad! I honestly couldn't ask for a better partner.....it really does just keep getting better!
 Chad took us all to the Redskins VS Buccaneers game! We had a blast with at least 35 friends from Virginia tailgating and just catching up!
 NEW wedding/anniversary/Initial pillow cases were added to the shop! Super great wedding gift! You choose the colors.....and I paint and sew the pillow case to match!
And just this week....COLLIN WAS PICKED TO BE STUDENT OF THE MONTH! He is such a super student and kid and it just makes me feel so proud knowing that his teacher sees this as well! His big sister has gotten this award every year, so he couldn't have been more excited to be in this spotlight!

 
Collin also was super excited to get back into BMX racing....so we are back to being at the track! I was SO nervous his first race and instead of screaming "go faster" the entire race, Kacey was screaming "SLOW DOWN COLLIN".  We have now gotten over our fear (or at least are pretending to be over it) and are excited!


Okay.....that pretty much has me all caught up! I have done all of this crazy stuff with MONO! I seriously just found out that I have had mono for about 2 months now......without knowing it! I thought I was just being super lazy, so I feel much better knowing that I have accomplished so much while sick!

I have some exciting news coming up about our pillow cases....so be on the lookout!

xoxo

Friday, June 22, 2012

Our Summer Via Instagram

 My little man was picked as Student of the year!!!!!! He is a rule follower and was super proud of himself, and we were too!
 Kacey made the Travel Soccer Team and we are super stoked to watch her learn and play! Some of my all time favorite memories were going out of town for soccer tournaments with my team!
 We are still slightly in shock that our baby has graduated preschool! Where on earth has my little boy gone?
 So proud of this little guy!
 We are loving the new summer decor from our new shop, SaseaDecor I think my fave is the anchor.
 Making Silhouettes has been on my "to do" list for a few years, and I finally got around to making them. It is actually crazy how much Kacey and I look alike here, and Chad and Collin are pretty much always twins.
 My hubby went to get our oil changed in my old Armada...and came home with a new one. He is CRAZY! I love it, but just wishing that it wasn't black, not really a fan of the color....but love the car!
 We spent father's day at the beach celebrating Chad! He is such an amazing dad and my kids are madly in love with him! Collin wants to grow up and "be a dad just like him".  So grateful that my kids get to grow up with him as their dad, and I get to be his partner through it all.
 A little water polo with Grampy.  These two are too cute together!
 Collin mastered blowing a "bubble inside of a bubble".  It was on his to do list for the summer, and he has gone through several packs of gum and figured it out. ha!
 Our fave after pool snack is smoothies. I think we could have them daily and never get sick of them! mmm!
We rarely get date nights....but we go on family dates often! They are our favorite and I am sure that the rest of the summer will be filled with many more!

Hope your summer is shaping up to be a great one!!!!!

xoxo

Monday, June 4, 2012

SaSea Decor

I have been an awful blogger lately! I have a few tutorials and pictures of our home projects we have been working on to post soon! I am so excited to share all of the hard work we have done!

I have some fun news on our shops as well.......we are still selling our original pillow cases in our shop here.  I have also added a new shop! We will be selling decor weight pillow cases in larger sizes in our new shop SaSeaDecor!  I am so excited about this addition! I might eventually add them together in the same shop, but I wanted to keep them separate for a bit because even though both shops sell pillow cases....they are very different! SaSea Boutique has all screen printed cases, while SaSea Decor has decor weight fabric and I hand paint the images. 

Check us out!!!!!


Use coupon code Instasale thru the 8th of June for 15% off your total purchase!

Thursday, March 29, 2012

Tutorial for Aging Wood and making Beach Art

I absolutely love to decorate our home with art that is special! Basically if it is hanging on our wall it is either...
1-picture of our family or friends
2-made by one of us
3-means something special to one of us

I have been super confused as to what to hang over our white couch in our living room for years! I have so many holes on the wall from switching frames in and out......so I needed something very large to cover the holes....and make us smile when we walk in our front door and see it.

I decided on making a Bike because we absolutely LOVE family bike rides.....taking the bikes to the beach and riding along the water......and just spending time outside. IT WAS PERFECT FOR OUR FAMILY!!!!!!
After my kids saw the bike....they both requested pieces for their rooms. :)

TADA!!!!!!!!!!! I LOVE IT!!!!!!!!!!!!!!!!!!! IT IS HUGE! 4 ft x5ft!!!!!
The only problem is figuring out how to hang this on the wall....and I will keep you posted on how we tackle that job.

Close up on the weathered wood, and the bike.

TUTORIAL ON MAKING THE WOOD LOOK WEATHERED.....AND FINISHING WITH BEACH ART

STEP 1: Figure out how large you want the final piece to be. They will cut the wood for you right at Home Depot so just purchase the amount of boards you need for the project and they will measure them just right for you! BONUS!


STEP 2: This part is SUPER smelly and I suggest doing it outside or in your garage with the door open. I did a lot of research on how to weather the wood without making it orange or feeling as though I just stained it. This is what I ended up using and LOVING.

Pour Apple Cider Vinegar in a bowl and set one steel wool in it to soak for 30-45 min.
In an additional bowl pour Balsamic Vinegar with the other steel wool and let it soak for 30-45 min.

STEP 3: While the steel wool is soaking, I hit the boards with a hammer, screw driver, poked with a fork, and basically anything that I could use to hit them to add a little character.


STEP 4: Rub each board all over with the apple cider vinegar, don't forget the sides of each board. I waited about 10 min and then rubbed the Balsamic Vinegar over the boards. Make sure to get it into the little knots that you made with the hammer.

LET DRY OVER NIGHT. (OTHERWISE IT IS KIND OF STICKY)

STEP 5: Once the boards are dry we went to town with the sander. I used super heavy paper and just went to town. I sanded the tops of the boards to give them a little scratch as well as all of the edges. You can go as heavy as you would like on this step.

STEP 6: I purchased these bars to hold the boards together. (I seriously have NO idea what they are called) Make sure to buy them large enough so that when you screw them, it does not split the edges.

NOTE: IF HAD HOME DEPOT CUT MORE THAN ONE BOARD, THE COLORS MAY VARY, SO YOU MIGHT WANT TO ALTERNATE BOARDS.

STEP 7: This is my favorite part......PAINTING. I used craft paint for the project, but you can use any paint you would like. I did not do more than one coat with each color because I wanted it to show the wood thru the paint.

We did not use stencils and just free handed the piece. You could use stencil, vinyl, or trace image for this step depending on the affect you are looking for.


STEP 8: WAHOOOO......SIT BACK AND ENJOY YOUR BEAUTIFULLY WEATHERED ART!


I hope you enjoy this tutorial as well as the art you make from it.

xoxo

Wednesday, March 28, 2012

Growth Chart Tutorial

We have always kept a growth chart of our kid's height on their bedroom door. I absolutely love looking at it and seeing how fast they grow! My parents charted our growth on the door when we were growing up and once they moved I realized that we didn't mark it down on something that we could see later. SO SAD!!!! I would have loved to have something with my growth to compare how much taller my children are than me. :)

I have been crazy project lady for the past week and was not able to share due to problem with our computer.

For the growth board all you need is a 6 foot board. (unless you have people in your family larger than 7 feet....then you will need a larger board)

I weathered the wood (tutorial on that tomorrow) and let it dry for two days

Sanded edges of the board like crazy.....the more the better in my opinion!

Went to town painting the inch marks and played around with the design.

I am hanging the board one foot off the ground so that the 6 foot board will actually measure up to 7 feet.

I think we will have a lot of fun with it! I plan on putting their grandparents height, Chad and my height, and theirs as they grow. I just love the idea of always having this.


I added some sea glass blue stripes and just painted the numbers freehand.

This will be hung one foot off of the floor. (that is the hubby's job because I tend to add a few extra holes to the walls)


This is the records that we have taken up until now. :) I will still continue to let them keep this on their doors.....but it won't hurt so bad if we move anymore.

Enjoy!
Come back tomorrow for a tutorial on how I weathered the wood....and a few other fun projects!

xoxo

Tuesday, March 27, 2012

Chopped Salad Wrap

I have said it a million times...I am ALL about fast dinners that are healthy, easy, and yummy! This is one of my "go to" weekly meals that is honestly one of our favorites. I used to go to a wrap shop in Boca Raton on a weekly basis for a chopped salad wrap....and once we moved I had to make them on my own.

There is really no recipe.....Just look through your pantry and fridge and start pulling...

- protein (we use either rotisserie chicken, left over chicken, deli meat, hard boiled eggs, sometimes even chicken tenders)

-your favorite dressing (we use either ranch or a sesame dressing)

- fave cheese (I usually shred it)

- fave veggies or fruit (corn, carrots, broccoli, oranges, apples, grapes, avocado, beans...anything will work!)

-Lettuce (bag of lettuce or whatever greens you have)

-Croutons (I will not lie, I have been known to add chips for a crunch)

-Wrap (buy them large so you can pack the salad inside)


This is what we used tonight in our wraps....leftover chicken, corn, egg, pepper jack cheese, and croutons.

I went out and bought a metal bowl because that is what they used at the store I used to go to.....and just dump all of the ingredients in.

Chopping it up like crazy with the pizza cutter is probably my favorite part! It is right up there with beating chicken! I don't add the dressing until it is all chopped up and then I just stir it in.


TaDa! Easy....leftover heaven.....chopped salad wraps! MMMMM!

Enjoy!

Thursday, March 22, 2012

Here's to Dreaming...


Today I wish I was in Aruba....with a frozen drink....by the water.....and NOT on my way to take the kids to the dentist. ugh!!!

Tuesday, March 13, 2012

Thank you Pinterest for Feeding My Family

I am not a chef....and I honestly don't really enjoy food enough to spend a lot of time on it. I would be just as happy having a sandwich or pasta every single night of the week. This was a great plan.....until I had a family that requires meals.

I have found some super easy and fast recipes on Pinterest and here are a few that I have made....loved....and will make again! We are generally up at the fields involved in some sport or running 5 nights a week, so fast and easy is key for me!


I have been known to make this call. Actually......I am not THAT lazy! I usually order the pizza myself and just call Chad to tell him what to expect for dinner. :)
'

Melon Mint Sangria!

Recipe found here
This is seriously an amazing summer sangria! It is so fresh and super easy! We went thru two batches at a recent girl's night I hosted!


Fruit Salsa and Cinnamon Chips

Recipe found here
This is AMAZING!!!!!!!!!!!!!!!!! I have not mastered the cinnamon chips yet, but the salsa was sooo great that it didn't even matter! I think my kids have requested this nightly since we made it!

Crockpot Honey Sesame Chicken

Recipe found here
This was AMAZING! I did not use the thigh chicken that the recipe called for...and opted for Chicken breasts. This is a MUST MAKE!


Shrimp Quesadilla with Avocado

Recipe found here
This is probably my favorite recipe yet! I am actually making this for dinner tonight now that I saw this picture and remember how good it is! MMMM!


Buffalo Chicken Dip

recipe found here
Such a good appetizer/meal! We ate so much of it that we decided to skip dinner! I used the rotisserie chicken and it was super easy and a total hit!


Jalapeno Chicken

recipe found here
Soooo Good! I had to make half without the chips for my kids because it is really spicy!


Sticky Buns
Link
recipe found here
I have seriously made this for breakfast at least 10 times....including Thanksgiving morning....Christmas morning.....and basically anytime that we want an amazing breakfast!

Hope this helps with some ideas for your dinner plans!

ENJOY!!!!!!!!!
XOXO